Configuring a VoIP Phone Using Automatic Registration on the NEC SL2100 or SL1100
Configuring a VoIP Phone Using Automatic Registration on the NEC SL2100 or SL1100
Automatic registration of an IP phone allows the phone to be programmed with a particular extension username and password using a Personal ID Index. We strongly encourage this procedure is completed before launching the IP Phone in a remote location.
Get Connected
This Tech Tip requires access to the phone system using NEC PCPro Programming Software. To download the latest version of PCPro or for instructions on how to connect your computer to the phone system, please read the following: How to Connect to the NEC SL2100 or SL1100 Phone System for Programming.
PCPro Programming Steps
Note: In this example we will be using extension 109, but you may use another available extension.
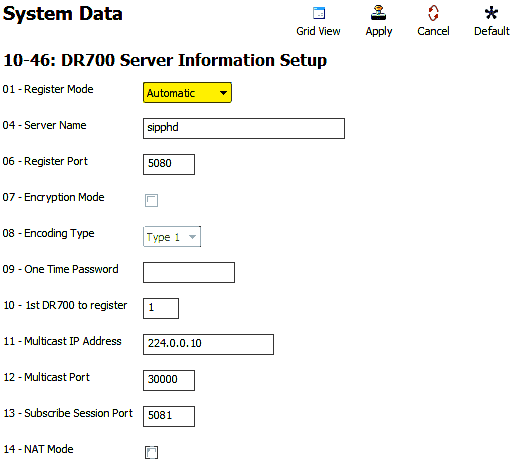
1. Go to Program 10-46: DR700 Server Information Setup
2. Set the value of Program 10-46-01: Register Mode to “Automatic”
3. Click on the “Filter Options” tab, on the top of the PCPro window
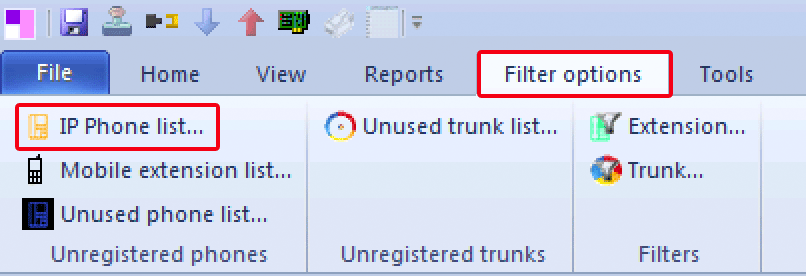
4. Click the “IP Phone List…” button
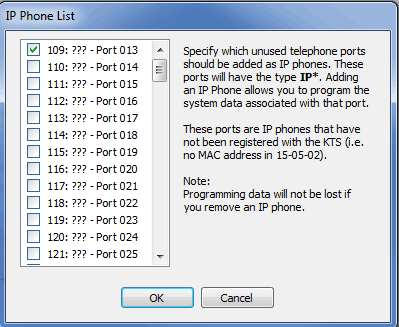
5. In the IP Phone List pop up window, click the checkbox next to any extension(s) you want to use with an IP DECT Handset
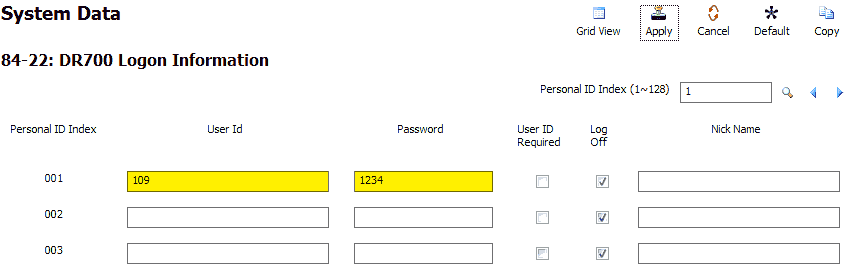
7. Go to Program 84-22: DR700 Logon Information
8. For Personal ID Index 001, enter the following values:
User ID: The extension number (109)
Password: 1234
A single ID index should be assigned to only one extension. Numerical values are the only available options for a password. Alphanumeric values will not be able to be entered once in the IP Phone Programming portion.
9. Repeat step 8 for each of your extensions
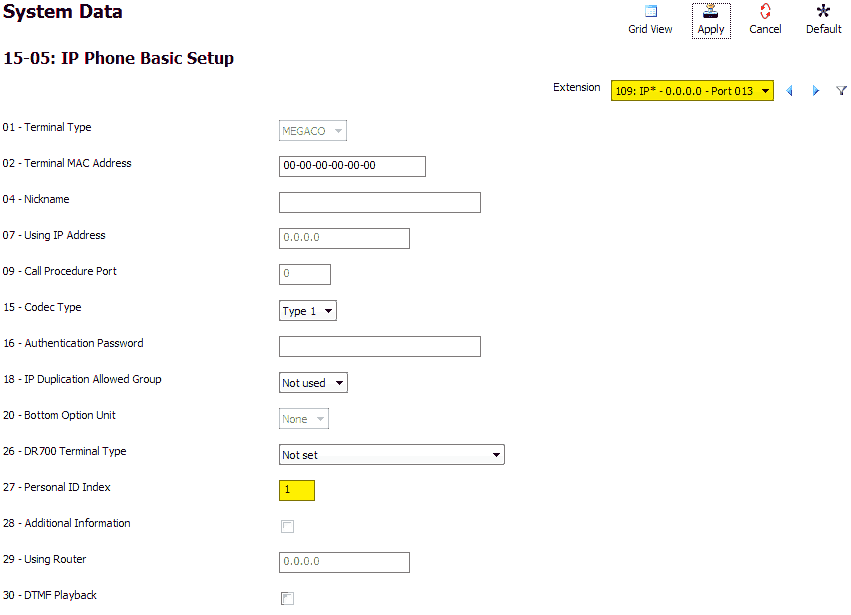
10. Go to Program 15-05: IP Phone Basic Setup
11. Use the Extension dropdown menu to select your IP Extension
12. Set the value of 15-05-27: Personal ID Index to match the Personal ID Index Number from step 8
13. Repeat steps 11 and 12 for each of your extensions
14. Apply and upload your changes
IP Phone Programming Steps
Perform the following steps on an idle IP Phone that is connected to the phone system
1. Press these keys, one after another: Hold, Transfer, *, #
2. Leave the default username of “ADMIN”
3. Press the “Set” soft key
4. Enter the password: 6633222
5. Press the “OK” soft key
6. Press 2 for “SIP Settings“
7. Press 1 for “SIP User“
8. Press 1 for “SIP User ID“
9. Enter the username: 109 (this is the username we set in Program 84-22)
10. Press the “OK” soft key
11. Press 2 for “Password“
12. Enter the password: 1234 (this is the password we set in Program 84-22)
13. Press the “OK” soft key
14. Press the “Back” soft key
15. Press 2 for “Server Address & URI“
16. Press 1 for “1st Server Address“
17. Enter the IP Address of your phone system (refer to Program 10-12-09)
You can enter in periods by pressing the * key. If you need to delete an error when entering in the address you may do so by selecting the “Clear/Back” key on the IP Phone.
18. Press the “OK” soft key
19. Keep pressing the “Back” soft key until the key changes to “Save”
20. Press the “Save” soft key
21. The phone will connect to the KSU and the extension will be ready to use