Announcement Mailbox Setup on the NEC SL2100 and SL1100
Announcement Mailbox Setup on the NEC SL2100 and SL1100
This Tech Tip will demonstrate how to program an Announcement Mailbox Option from a Dial Actions Table. This can be used for Announcement Messages such as business hours or directions. This tip applies to the NEC SL2100 and NEC SL1100.
Get Connected
This Tech Tip requires access to the phone system using NEC PCPro Programming Software. To download the latest version of PCPro or for instructions on how to connect your computer to the phone system, please read the following: How to Connect to the NEC SL2100 or SL1100 Phone System for Programming.
Prerequisites
Programming a Full Time Voicemail Attendant on an NEC SL1100
Programming a 24/7 Part Time Voicemail Attendant on an NEC SL1100
PCPro Programming Steps
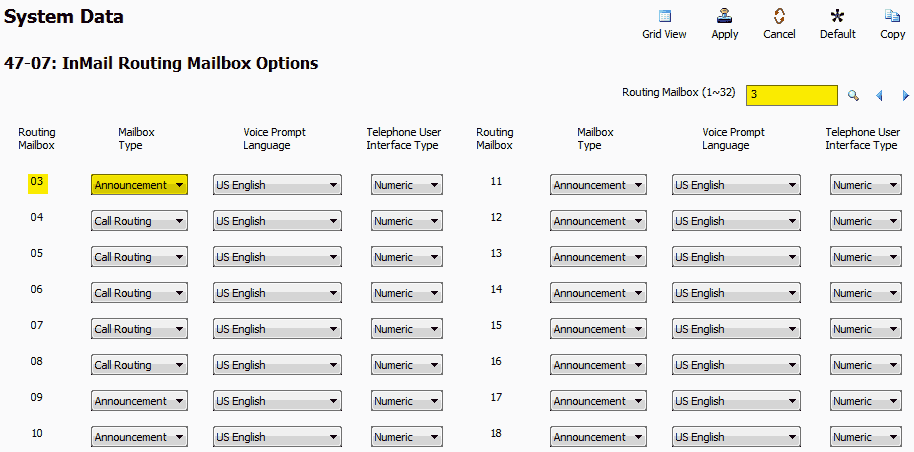
1. Go to Program 47-07: InMail Routing Mailbox Options
2. For Routing Mailbox 03, set the Mailbox Type to “Announcement”
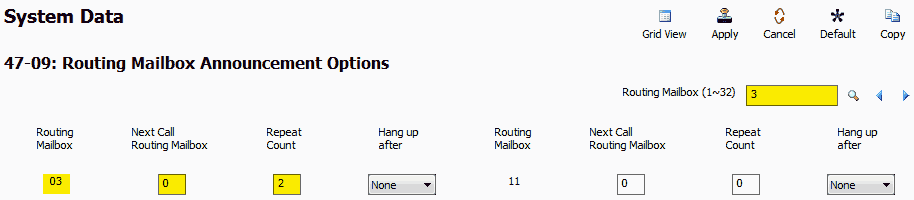
3. Go to Program 17-09: Routing Mailbox Announcement Options
4. For Routing Mailbox 03, set the following values:
Next Call Routing Mailbox: 0
Repeat Count: 2
The Repeat Count is set to 2, because we want the caller to hear the Announcement Mailbox (Hours & Directions) two times before disconnecting the call so it does not tie up a line on the system.
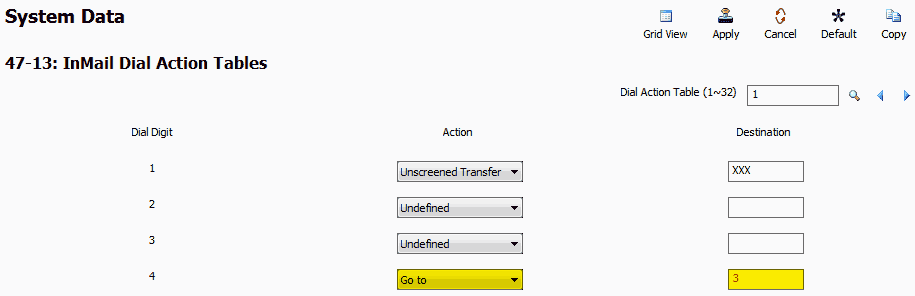
5. Go to Program 47-13: InMail Dial Action Tables
6. Choose a digit that the caller will press to hear the announcement. (We used Digit 4 in our example) and assign it the following values:
Action: “Go to”
Destination: 3
This will route the caller to Routing Mailbox 3, which we have defined as an Announcement Mailbox
Recording the Announcement Message
Note: The following steps must be done from Extension 101
1. From Extension 101, press the “VM” soft key
2. Dial 72 on the phone’s keypad
72 = SA (System Administrator)
3. Press the “Annc” (Announcement) soft key
4. Enter the Mailbox Number of the defined Announcement Mailbox (003 in our example)
5. Press the “Rec” soft key to begin recording the Announcement Message
6. Press “#” when done recording