Creating a Private Line on the NEC SL2100 or SL1100
Creating a Private Line on the NEC SL2100 or SL1100
This Tech Tip demonstrates how to program a trunk so that only one extension may use it for inbound or outbound calls – effectively creating a private line. This tip applies to both the NEC SL2100 and NEC SL1100 Phone System.
This Tech Tip demonstrates how to program a trunk so that only one extension may use it for inbound or outbound calls – effectively creating a private line. This tip applies to both the NEC SL2100 and NEC SL1100 Phone System.
Get Connected
This Tech Tip requires access to the phone system using NEC PCPro Programming Software. To download the latest version of PCPro or for instructions on how to connect your computer to the phone system, please read the following: How to Connect to the NEC SL2100 or SL1100 Phone System for Programming.
This Tech Tip requires access to the phone system using NEC PCPro Programming Software. To download the latest version of PCPro or for instructions on how to connect your computer to the phone system, please read the following: How to Connect to the NEC SL2100 or SL1100 Phone System for Programming.
PCPro Programming Steps
Note: In this example we will be designating trunk 4 to be used by only Extension 109 for all outgoing and incoming calls.
Note: In this example we will be designating trunk 4 to be used by only Extension 109 for all outgoing and incoming calls.
Outgoing Calls
1. Go to Program 14-05: Trunk Groups
2. For the desired trunk, set the value of Trunk Group to “2”
3. For the desired trunk, set the value of Priority to “1”

4. Go to Program 14-06: Trunk Group Routing
5. For Route Table 02, set the value of Priority Order 1 to “2”

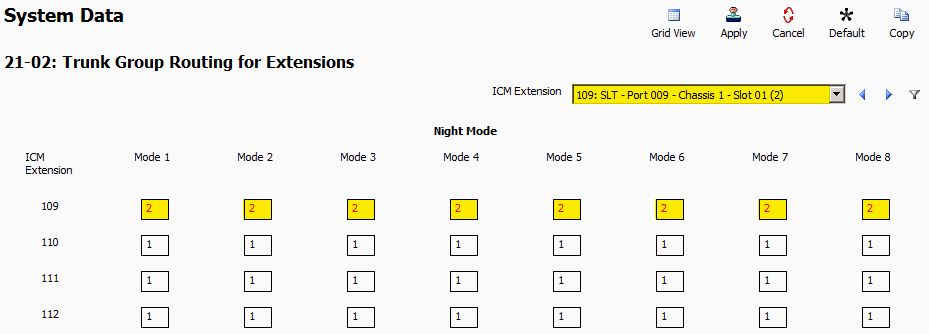
6. Go to Program 21-02: Trunk Group Routing for Extensions
7. Use the ICM Extension Dropdown Menu to select Extension 109
8. For the desired extension, set the value of All Modes to “2”
9. Apply and upload your changes
1. Go to Program 14-05: Trunk Groups
2. For the desired trunk, set the value of Trunk Group to “2”
3. For the desired trunk, set the value of Priority to “1”
4. Go to Program 14-06: Trunk Group Routing
5. For Route Table 02, set the value of Priority Order 1 to “2”
6. Go to Program 21-02: Trunk Group Routing for Extensions
7. Use the ICM Extension Dropdown Menu to select Extension 109
8. For the desired extension, set the value of All Modes to “2”
9. Apply and upload your changes
Incoming Calls
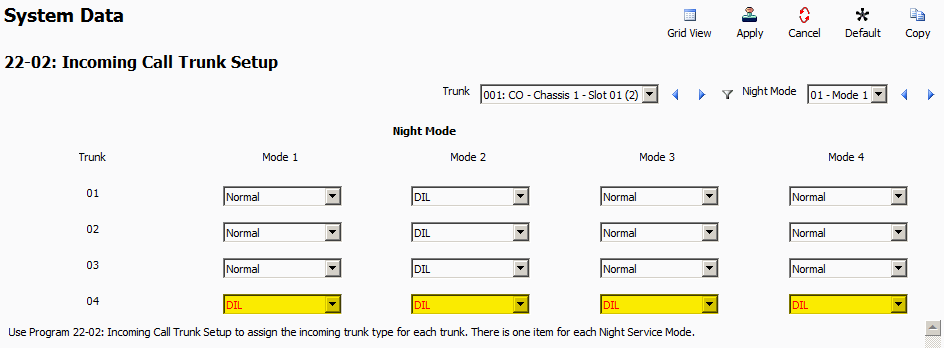
1. Go to Program 22-02: Incoming Call Trunk Setup
2. For the desired trunk, set the value of All Modes to “DIL”
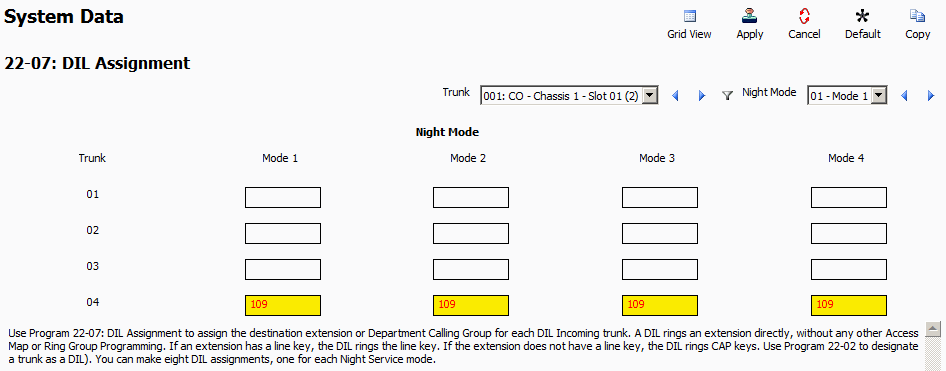
3. Go to Program 22-07: DIL Assignment
4. For the desired trunk, set the value of All Modes to “109”
5. Apply and upload your change
1. Go to Program 22-02: Incoming Call Trunk Setup
2. For the desired trunk, set the value of All Modes to “DIL”
3. Go to Program 22-07: DIL Assignment
4. For the desired trunk, set the value of All Modes to “109”
5. Apply and upload your change